Under such circumstances, you need alternative methods to transfer photos from your PC to your iPhone or vice versa. This guide will show you five methods and iTunes alternatives that you can employ to move photos among your devices effortlessly.
Methods to Transfer Photos from Mac or Windows to iPhone or iPad
Listed below are 5 different methods of transferring photos from Mac or Windows PC to iPhone or iPad. You can use the one that suits you best. Now, without further ado, let’s get started!
Method 1: Use iTunes Alternative Software
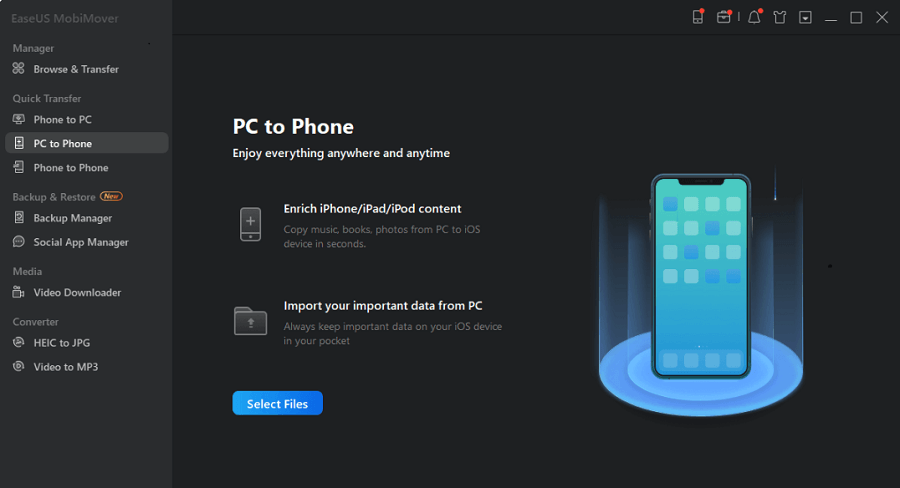
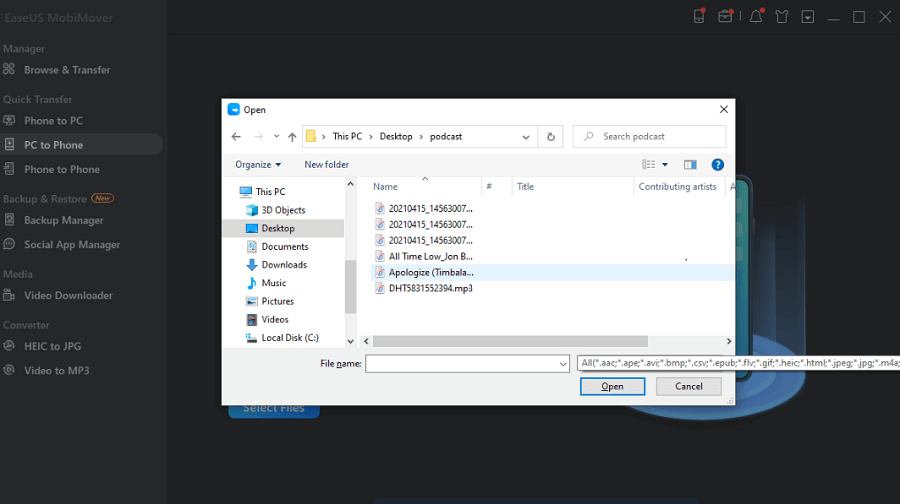
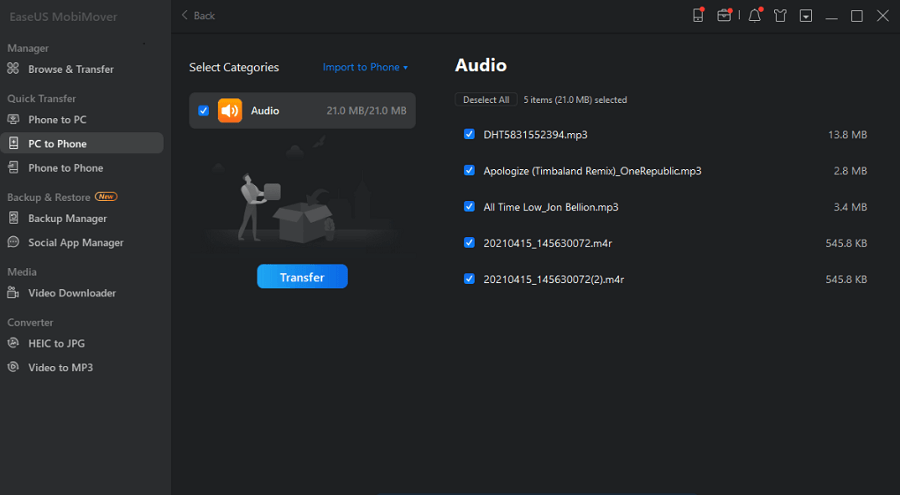
Are you also on a hunt to figure out the most efficient yet effective way to transfer photos from your PC or Mac to iPhone? If yes, then we’re feeling delighted to introduce; this amazing yet free iTunes alternative software, EaseUS MobiMover. This software acts as the perfect iTunes alternative and supports the and other files from your PC to iOS devices and vice versa. That’s not all, it also provides a plethora of edgy tools like WhatsApp manager, video downloader and converter, restores & backup wizard, and HEIC converter. All these tools lend you a hand in managing your files without breaking a sweat. EaseUS MobiMover is also supported on macOS, you can use it to transfer files between your iPhone and Mac too. Here are the steps to send your photos from PC to iPhone using EaseUS MobiMover: Step 1: Connect your iPhone to your PC with Windows 7 and above versions. Launch the EaseUS MobiMover software and choose “PC to Phone” on the main screen. Step 2: Then, choose ” Select Files” to move ahead. Step 3: With MobiMover software, you can select to transfer photos from your PC to your iPhone and many other data formats. After that, click on the “Open” button to load files. Step 4: MobiMover will give you a view of the files you’ve selected on the screen. If a file is missing, you can click on “Add contents” to import more files. Step 5: Lastly, click on the “Transfer” button to initiate the transfer process. So, that’s how you can transfer photos from PC to iPhone and vice versa using EaseUS MobiMover. There are other iTunes alternatives on the net and you can surf the internet to find some other options rather than EaseUS MobiMover. Also Read: How to Reset iTunes Lockdown Folder on Mac and Windows
Method 2: Transfer photos from computer to iPhone using iCloud Photos
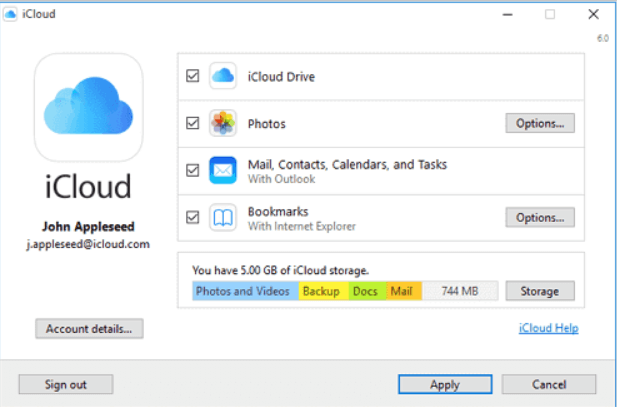
You can also use the iCloud library to put photos from your computer to iPhone. The key is to select photos from your computer and upload them to iCloud.com. Doing so will automatically sync photos to your iPhone. You can also do the same using the iCloud app if it’s already installed on your PC. Note: To avoid issues like “iCloud photos not syncing” ensure you have enough space to store the “to be transferred” photos. Here are the steps to transfer photos from your PC to iPhone without using iTunes: Step 1: Upload your photos from the computer to iCloud. Step 2: Toggle “iCloud Photos” on your iPhone by navigating to “Settings”. Then, locate “Photos” under “iCloud”. Step 3: Launch the Photos app on your iPhone and see the uploaded photos. Download the ones you need to transfer to your iPhone as per your needs. Most users prefer using iCloud to send photos from their PC to their iPhones. As it’s a reliable and fast way to do so. Also Read: How to Restore Deleted Notes from iPhone, iPad, Mac, or Windows PC
Method 3: Upload the photos from PC to iPhone using File Explorer
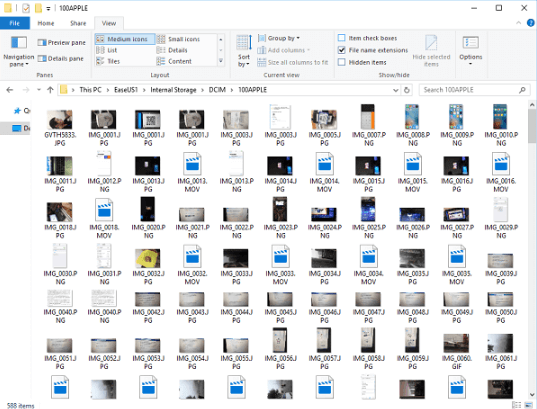
If you’re a person who isn’t much tech-savvy, you can also opt for the traditional process to transfer photos using a USB cable to connect your phone to the PC. You can easily transfer photos from PC to iPhone just by accessing your iPhone’s internal storage using your computer and then simply pasting photos into the DCIM folder of your phone. Then, you can easily access the photos in the native Photos app of your iPhone. Here are the steps to do so: Step 1: Connect your iPhone to your PC using a USB cable. Step 2: Unlock your ios device and trust the PC. You may also have to enter your iPhone passcode to move further. Step 3: Navigate to “100APPLE” < “DCIM” < “Internal Storage” < [your device name] < “This PC”. Step 4: Head on to the Photos app to ensure the successful transfer of photos from the PC to the iPhone.
Method 4: Transfer Photos From PC to iPhone by Google Photos
Google Photos is just a better alternative than its apple counterpart, iCloud. Whereas iCloud only offers 5GB of free storage space to store photos, which is far from the need of someone with a vast photo collection. Google Photos provides free and unlimited photo storage to its users. So, if 5GB is not enough for you and you don’t want to spend either. Then, Google Photos is the perfect choice for you. Here are the steps to take advantage of Google Photos’ unlimited storage: Step 1: Open Google Photos and sign in with your Google account. Step 2: Click on “Upload” and then on “Computer” to upload the photos you want to have on your cloud storage. Step 3: Download Google Photos on your iPhone from the App Store. Sign in with the account you have used on your computer. Step 4: In the Google Photos app, go to the “Photos” section to see the transferred pictures. Also Read: How to Transfer Data from Your Windows PC to a Mac
Method 5: Transfer Photos From PC To iPhone using OneDrive
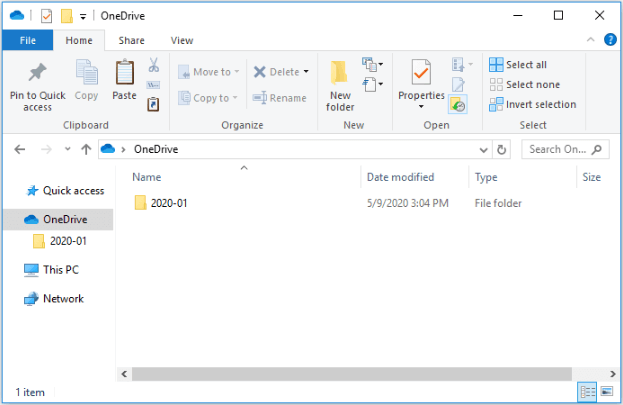
Microsoft offers built-in utility software that also has a mobile app for iOS. To our favor, this app supports photos, videos, music, and other data types. Hence, it can be used to transfer photos from your PC to your iPhone. But, unlike Google Photos, OneDrive offers only 5GB of free storage space to its users. However, if you’re an Office 365 subscriber, you can enjoy up to 1TB of free OneDrive storage space. Follow these steps to move photos from your PC to your iPhone without a hassle: Step 1: Organize OneDrive on your PC. Step 2: Copy and paste the photos or files to the OneDrive folder on your PC. Step 3: Now, download the OneDrive application on your iPhone from the App Store. Step 4: After downloading OneDrive, sign in with your Microsoft account. Step 5: After the sync gets complete, you can access the uploaded photos from the OneDrive app. Also Read: Best iPhone and iPad Cleaner Apps to Clean Storage Wrapping Up So, these are 5 ways that you can use to transfer photos from Mac and Windows to iPhone or iPad without using iTunes. These methods are tried and tested by thousands of users and have worked wonders for them and can do the same for you. Try each method and select the one that satiates your needs and wants. That’s all! We hope you found this detailed article helpful. Please tell us in the comments section below if you have any queries or further suggestions. For more tech-related information, subscribe to our Newsletter and follow us on Social Media.
