Send Email Using Cortana
Sending an email using Cortana is really easy in Windows 10. First, you need to set up an email account with either Microsoft Outlook or Hotmail, and follow the steps below. The first few steps are meant for setting up Cortana and training Cortana to recognize your voice. You can skip these steps in case you have already set up Cortana.
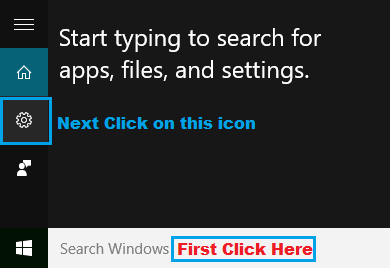
Click on the Windows 10 search box or the Cortana search box as it is increasingly being referred to.
Click on Cortana’s settings icon (See image below)
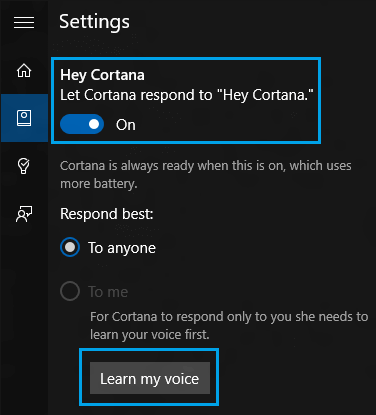
On the settings screen make sure that Hey Cortana is set to On Position (See image below)
Go down and click on Learn My voice button (See image below)
5. In this step, you will be reading out the 6 phrases that Cortana will ask you to say and complete the process. You can skip steps 4 and 5 above, as Cortana works fine even without voice training. However, spending a few minutes to train Cortana to recognize your voice will get you better results. Once you have setup Cortana and gone through the voice configuration process, you can proceed to the next steps to send an email by giving voice commands to your digital assistant Cortana.
Ask Cortana to Send Email
- Click on the microphone symbol in the search box within Cortana or the taskbar to make sure that your microphone is on.
- Once the mic is activated, say, “Hey Cortana, send an email“.
- Cortana will respond with “Who is the email going to” – Say the recipient’s name. You need to have the recipient in your contacts with name and email address, so that Cortana can pick the right email address.
- Cortana will ask you “What’s the subject” – say your subject line
- Cortana will say “What’s your message” – say your message
- Cortana will display the email that she has composed and say “Here is your email, send it? Add more or Make changes”.
- In case you want to make changes to the email, say, “Make Changes” and go through the process of getting your email right.
- Say send it, once you are satisfied with the email.
How to Disable Cortana in Windows 10


