Pause Automatic Updates in Windows 10
As you must have noticed, Windows 10 automatically downloads and installs updates on the computer, as soon as they become available for your computer. While it is a good practice to install updates as soon as they become available, there are some users who do want to be the first ones to install updates on their computer. In general, the most common reason for Pausing Updates on a computer is to prevent the possibility of an update becoming incompatible with Apps and programs installed on the computer.
1. Pause Windows Updates for up to 35 Days
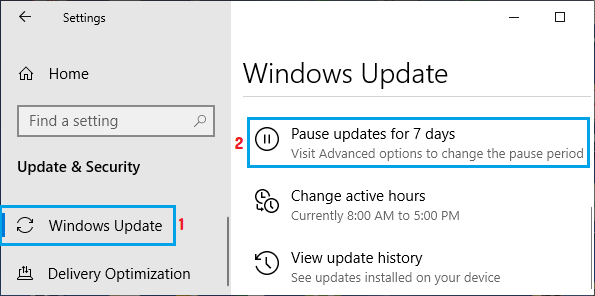
Windows 10 provides the option to pause updates for 7, 14, 21, 28 and 35 Days. Go to Settings > Update & Security > Select Windows Update in the left-pane. In the right-pane, scroll down and click on Pause updates for 7 days option.
This will Pause Windows Updates on your computer for 7 days, after which your computer will automatically download and install available updates. If you want more time, click on Pause Updates for 7 more Days option and this will add 7 more days to the Pause period. Similarly, you can continue clicking on Pause updates for 7 more days option, until you reach 35 days and the Pause updates option becomes grayed out.
2. Pause Updates Until Selected Date
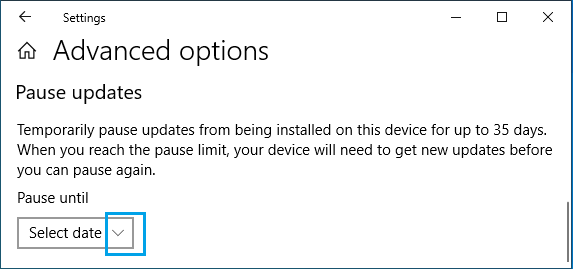
Instead of delaying updates by increments of 7 days, you can pause updates until a specific date by following the steps below. Go to Settings > Update & Security > Select Windows Update in the left-pane and click on Advanced options in the right-pane.
On the next screen, click on Pause until drop-down and select the Date up to which you want to stop Windows Auto Updates.
This will delay Windows Updates on your computer, until the specific date that you selected in the drop-down. When the selected date arrives, Windows will automatically download and install available updates on your computer.
3. Pause Updates for More Than 35 Days
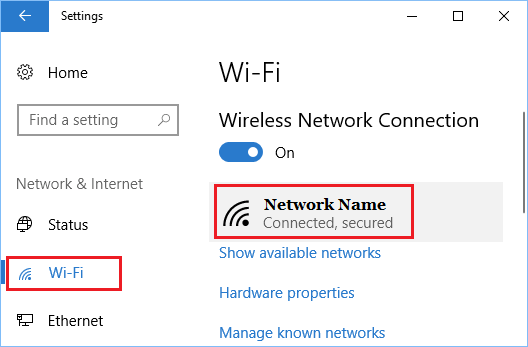
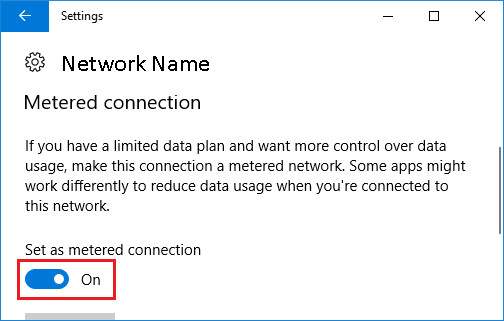
Designating your WiFi or Ethernet Network as Metered Connection prevents Windows 10 from installing updates on your computer. Go to Settings > Network & Internet > select WiFi in the left pane and click on your WiFi Network Name in the right-pane.
On the next screen, scroll down and enable Set as metered connection option.
After this, Windows should no longer download and install Updates Automatically on your computer.
4. Disable Automatic Updates Using Administrative Tools
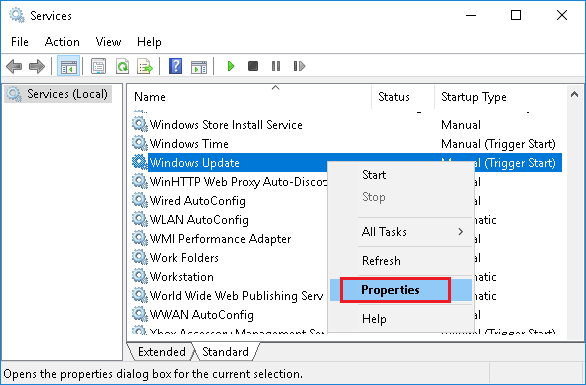
If you are using an older version of Windows 10, you can disable Auto Updates by signing into your Admin Account and following the steps below. Right-click on the Start button and click on Run. In Run Command window, type services.msc and click on OK.
On the Services screen, right-click on Windows Update and select Properties in the menu that appears.
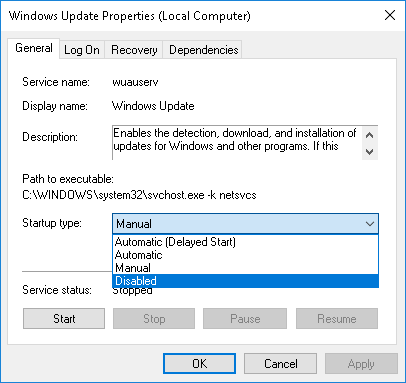
On Windows Update Properties screen, click on Startup type down-arrow and select Disabled option.
Click on Apply and OK to save the changes to your computer. Note: The disadvantage of this method is that it can prevent your computer from being up to date with Windows Updates. Make sure you periodically check for Updates by going to Settings > Update & Security > Check for Updates. If your computer has missed multiple updates, you may have to click on Check for Updates multiple times, until your computer says that it is up to date with Updates.
How to Fix Stuck Windows 10 Update How to Remove Bloatware From Windows 10 PC