Make Printer Online in Windows 11
If you have sent multiple files to the Printer, but cannot hear them being printed, it is likely that the Printer has lost connection with the computer and become offline. The reason for Printer being offline could be due to loose cable connections, printer driver being outdated or corrupted and printer switching to offline mode. You can find below a number of methods to make the printer online in Windows 11/10.
1. Disable Offline Mode
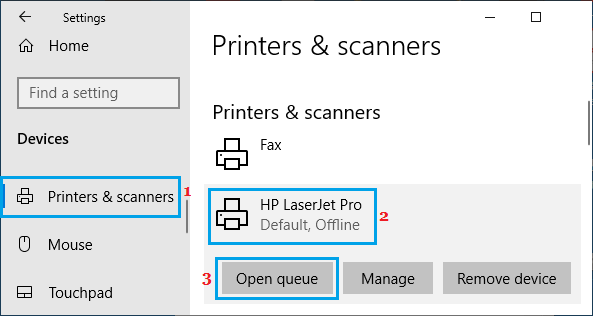
Go to Settings > Devices > select Printers & Scanners in the left-pane. In the right-pane, select the Printer that you want to make online and click on Open Queue option.
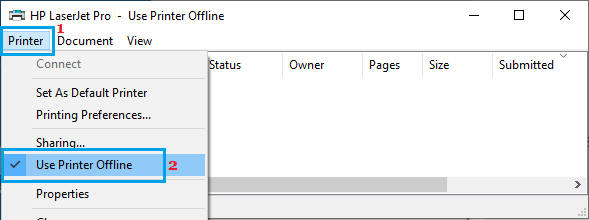
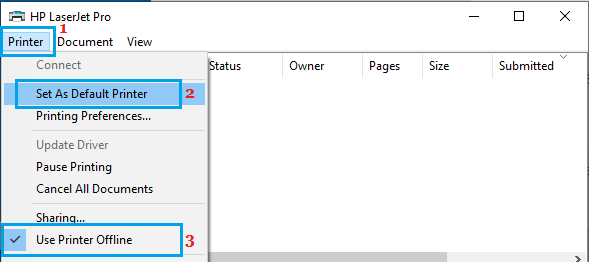
On th next screen, switch to Printer tab and uncheck Use Printer Offline option.
2. Restart Printer & Computer
Restarting the printer and computer can help in fixing minor software glitches and connectivity errors.
- Power OFF the Printer > Wait for 60 seconds and Restart the printer.
- Restart your computer and try to print a test page.
3. Run Printer Troubleshooter
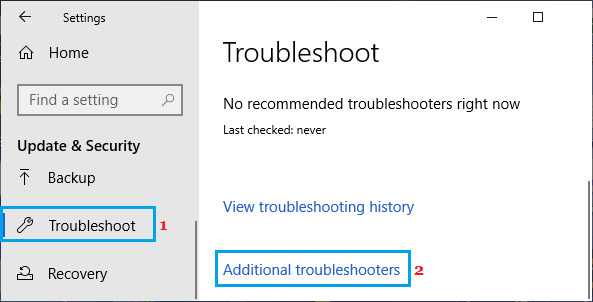
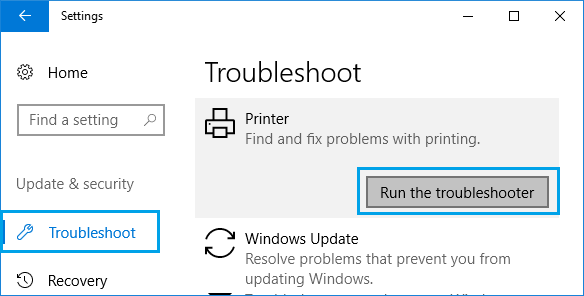
The built-in Troubleshooter in Windows 11/10 can be trusted to find and fix Printing problems on your computer. Go to Settings > Update & Security > select Troubleshoot in the left-pane. In the right-pane, scroll down and tap on Additional Troubleshooters.
On the next screen, select the affected Printer and click on Run the Troubleshooter button.
Follow the onscreen instructions as the Troubleshooter tries to find and fix printing problems on your computer.
4. Restart Print Spooler Service
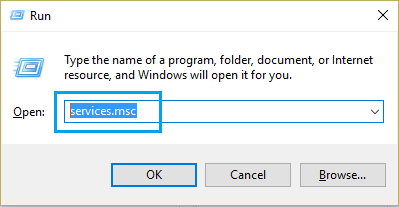
Right-click on the Start button and click on Run. In the Run command window, type services.msc and click on OK.
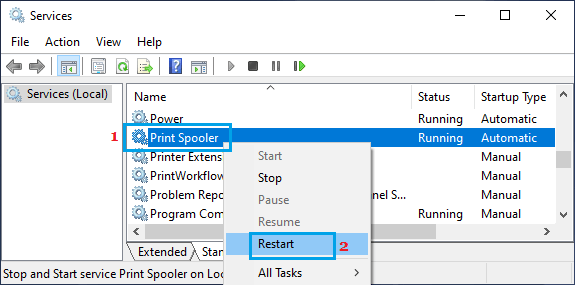
On the Services screen, right-click on Print Spooler and click on the Restart option.
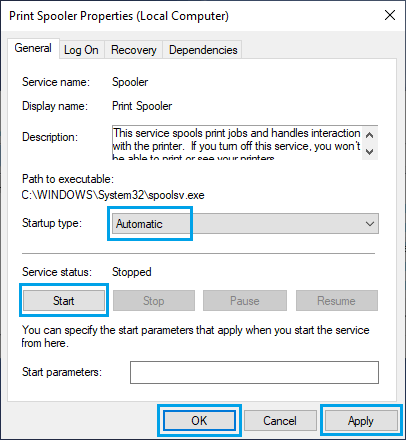
Also, make sure that Print Spooler service is set to Start Automatically. If it is not, double-click on the Print Spooler entry. On the next screen, change the startup type to Automatic.
Click on Apply and OK to save this change to the Print Spooler service on your computer. After this, restart the computer and you should be able to Print.
5. Clear The Print Queue
Sometimes, the problem is due to a document being stuck in the print queue. Go to Settings > Devices > select Printers & Scanners in the left pane. In the right-pane, select your Printer and click on Open Queue option.
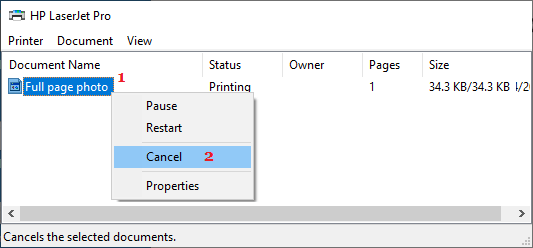
On the next screen, right-click on the Stuck Document (if any) and select the Cancel option in the right-click menu.
Once the stuck document is cleared, you should find the printer online and capable of handling print commands from the computer.
5. Set As Default Printer
If you usually use the same printer, making it as the Default Printer can help in avoiding printing problems in future. Go to Settings > Devices > Click on Printers & Scanners in the left pane. In the right-pane, select your Printer and click on Open Queue option.
On the next screen, select the Printer tab and click on Set As Default Printer option.
6. Remove and Reinstall Printer
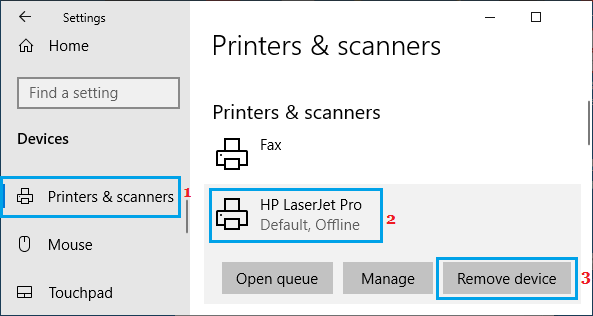
If above methods did not help, remove the Printer and Reinstall it back on your computer. Go to Settings > Devices > click on Printers & Scanners in the left-pane. In the right-pane, select your Printer and click on Remove Device button.
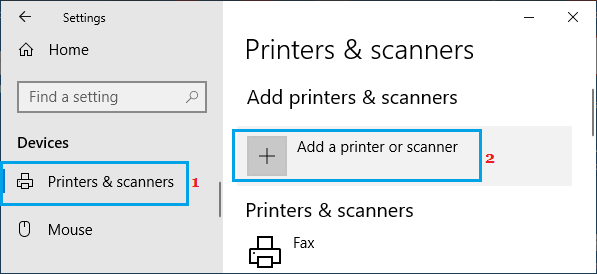
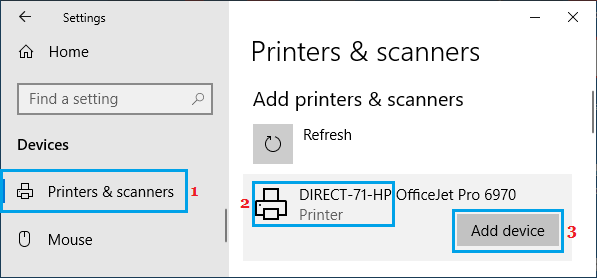
Go to Settings > Devices > select Printers & Scanners in the left-pane. In the right-pane, click on Add a printer or scanner option.
Once the Printer is discovered by the computer, select the Printer and click on Add device button.
Now, you should find the printer being online and you should be able to printer, without encountering “Printer is Offline” error message.
How to Find Printer IP Address in Windows 10 How to Fix Printer is Offline Error On Mac
