Enter DFU Mode on iPhone
iPhone DFU Mode (Default Firmware Update) is an advanced recovery and restore mode, which allows greater control of the device and provides access to advanced functions. An iPhone in DFU Mode allows you to install custom firmware, Jailbreak the device, Unlock SIM, Downgrade iOS, Unlock disabled iPhone and recover iPhone from problems. While it takes a bit of practice and skill to put iPhone into DFU Mode, you should be able to get it right within the first 2-3 attempts. The exact button combination (Home, Volume Up, Volume Down, ON/OFF or Side button) and the steps to enter DFU mode vary, depending on the model of iPhone. Hence, we are providing below (separately) the steps to enter DFU Mode on different models of iPhone.
1. Enter DFU Mode on iPhone 6, 6s, 5, 5s
Following steps below to enter DFU Mode on iPhone 6, 6s, iPhone 5, 5s.
Plug iPhone into computer and open iTunes.
Press and hold both Power and Home buttons for 5 seconds, until the screen goes black.
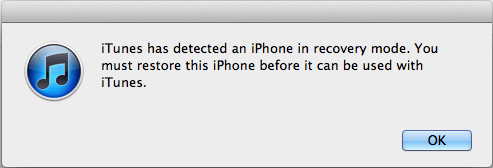
After 5 seconds, release the Power button and keep holding the Home button, until you see ‘iTunes has detected an iPhone in recovery mode’ pop-up on your computer.
Release the Home Button and your iPhone should now be in DFU Mode (Black screen).
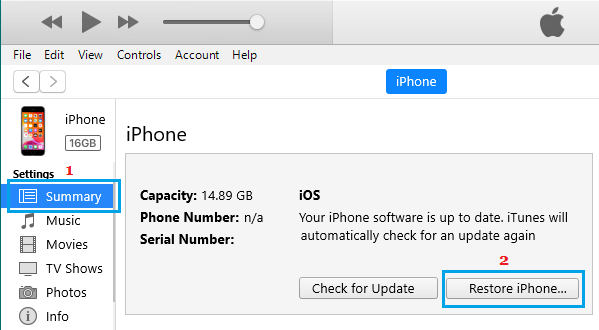
Note: If you do not see black screen, repeat steps (2 to 4), until the screen goes black. 5. On your computer, click OK on ‘iTunes has detected pop-up’ and you will see the option to Restore iPhone. Click on Restore iPhone button to start the process of Restoring iPhone.
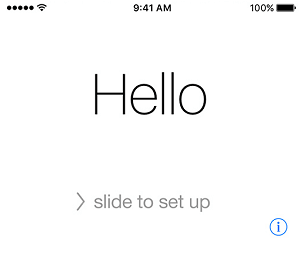
After the restore process is completed, your iPhone will start with Hello screen, allowing you to start the setup process.
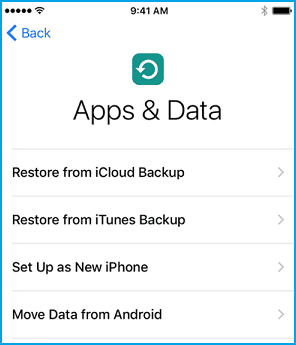
Follow the on-screen instructions, until you reach ‘Apps & Data’ screen. On this screen, you can choose from different options to Restore iPhone.
Select the Restore Option that suits your case.
2. Enter DFU Mode on iPhone 7 and iPhone 7 Plus
Follow the steps below to enter DFU mode on iPhone 7 and iPhone 7 Plus.
Plug iPhone into computer and open iTunes.
Press and hold both Power (ON/OFF button) and Volume Down buttons for 5 seconds, until the screen goes black.
After 5 seconds, release the Power button and keep holding the Volume Down button, until you see ‘iTunes has detected an iPhone in recovery mode’ pop-up on your computer.
Release the Volume Down button and your iPhone should now be in DFU Mode (Black screen).
Note: If you do not see black screen, repeat steps (2 to 4) until the screen goes black. 5. On your computer, click OK on ‘iTunes has detected pop-up’ and you will see the option to Restore iPhone. Click on Restore iPhone button to start the process of Restoring iPhone.
After the restore process is completed, your iPhone will start with Hello screen, allowing you to start the setup process.
Follow the on-screen instructions, until you reach ‘Apps & Data’ screen. On this screen, you can choose from different options to Restore iPhone.
Select the Restore Option that suits your case.
3. Enter DFU Mode on iPhone 8 and iPhone 8 Plus
Follow the steps below to enter DFU mode on iPhone 8 and iPhone 8 Plus.
Plug iPhone into computer and open iTunes.
Quickly, press and release the Volume Up button > press and release the Volume Down button.
Immediately, press and hold the Side button (ON/OFF button).
As the screen turns black, keep holding the Side button and press and hold the Volume Down button.
After 5 seconds, release the Side button and continue to hold the Volume Down button, until you see ‘iTunes has detected an iPhone in recovery mode’ pop-up on your computer.
Immediately, release the Volume Down button and your iPhone should now be in DFU Mode (Black Screen).
Note: If you see Apple Logo appearing, you have held down the Volume Down button too long. Repeat the process, till you get black screen. 7.On your computer, click OK on ‘iTunes has detected pop-up’ and you will see the option to Restore iPhone. Click on Restore iPhone button to start the process of Restoring iPhone.
After the restore process is completed, your iPhone will start with Hello screen, allowing you to start the setup process.
Follow the on-screen instructions, until you reach ‘Apps & Data’ screen. On this screen, you can choose from different options to Restore iPhone.
Select the Restore Option that suits your case.
4. Enter DFU Mode on iPhone X, XS, XS Max and XR
The steps to enter DFU Mode on iPhone X, XS, XS Max and iPhone XR are the same as on iPhone 8.
Plug iPhone into computer and open iTunes.
Quickly, press and release the Volume Up button > press and release the Volume Down button.
Immediately, press and hold the Side button (ON/OFF button).
As the screen turns black, keep holding the Side button and press and hold the Volume Down button.
After 5 seconds, release the Side button and continue to hold the Volume Down button, until you see ‘iTunes has detected an iPhone in recovery mode’ pop-up on your computer.
Immediately, release the Volume Down button and your iPhone should now be in DFU Mode (Black Screen).
Note: If you see Apple Logo appearing, you have held down the Volume Down button for too long. Repeat the process, till you get black screen. 7. On your computer, click OK on ‘iTunes has detected pop-up’ and you will see the option to Restore iPhone. Click on Restore iPhone button to start the process of Restoring iPhone.
After the restore process is completed, your iPhone will start with Hello screen, allowing you to start the setup process.
Follow the on-screen instructions, until you reach ‘Apps & Data’ screen. On this screen, you can choose from different options to Restore iPhone.
Select the Restore Option that suits your case.
How to Exit DFU Mode On iPhone?
In case you change your mind and do not want to DFU Restore iPhone, you can exit DFU mode by following the steps below. iPhone 6 and below: Press and hold Home and Side (ON/OFF) buttons, until you see iPhone starting with Apple Logo iPhone 7/7 Plus: Press and hold Volume Down and Side (ON/OFF) buttons, until you see iPhone starting with Apple Logo. iPhone 8/8 Plus/X/XS/XS Max: Quick press Volume Up > Volume Down buttons. Press and hold the Side (ON/OFF) button, until you see iPhone starting with Apple Logo.
Your iPhone will be out of DFU Mode as soon as you see the white Apple Logo appearing on the screen of your device.
Difference Between DFU and Recovery Mode
Whenever an iPhone goes into recovery mode, it automatically loads up a boot loader program known as iBoot, which automatically takes control of the device. This boot loader program performs firmware checks on the device and provides you with the option to Update or Restore the device. In comparison, DFU Mode completely bypasses the boot loader program, allowing you with greater control of the device and opportunity to perform advanced functions. Putting an iPhone into DFU mode requires bit more skills and timing, compared to putting iPhone in Recovery Mode.
Things can go Wrong with DFU Mode Restore
While a DFU mode allows you to perform advanced functions, it is not recommended on devices that may have suffered internal damage due to a fall, impact or water damage. DFU Mode Restore practically wipes out everything on your device and reloads back the code required to run both hardware and software on your device. Hence, if the DFU process gets interrupted (due to internal component damage), it can make the device unusable.
How to Backup iPhone Using iCloud and iTunes How to Backup iPhone to Mac Using Finder How to Factory Reset iPhone

