Create Daily System Restore Points in Windows 10
The System Restore feature in Windows 10 automatically creates a backup of all System Files and Settings, before installing major Windows updates and also when it detects major changes on the computer. In addition to this, you can also make your computer to Automatically Create Daily System Restore Points, so as to make sure that you have the latest backup of System Files and Settings available on your computer. If something goes wrong on your computer, you can roll back the computer to yesterday’s Restore Point, undoing only the most recent changes that lead to the problem on your computer. With this understanding, let us go ahead and take a look at the steps to Create Daily System Points on a Windows 10 computer.
Step 1. Enable System Protection on your computer
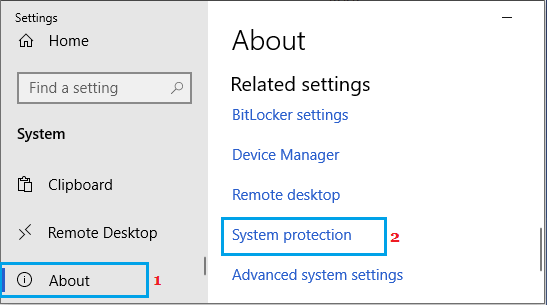
System Protection feature is not enabled by default in Windows 10. Hence, the first step is to Enable System Protection on your computer. Go to Settings > System > click on About in the left-pane. In the right-pane, scroll down and click on System Protection link under “Related Settings” section.
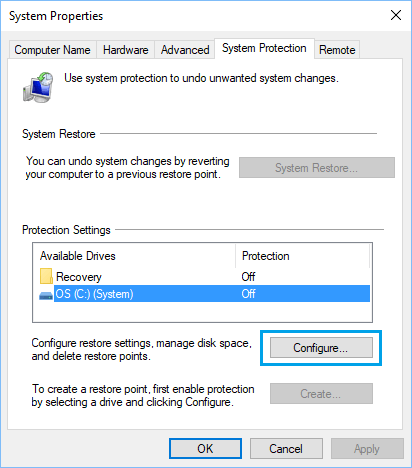
On System Properties screen, switch to System Protection Tab and click on the Configure button.
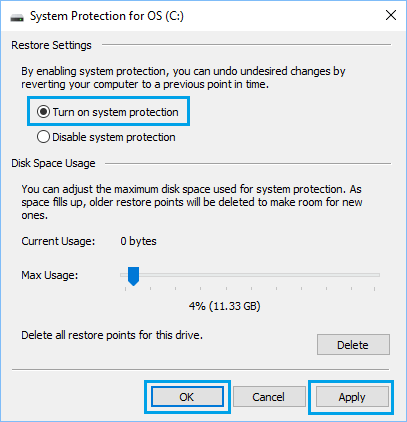
On the next screen, select Turn On System Protection option and click on Apply and OK.
This will activate or enable the System Protection feature on your computer. After Enabling System Protection, you can make your computer to Automatically Create Daily System Restore Points by using Windows Defender Registry (Windows Home) or by using Group Policy (Windows Pro).
Step 2. Create Daily System Restore Points Using Registry Editor
If you are using the Home edition of Windows 10, you can follow the steps below to Create Daily System Restore Points. If you are using Windows Pro, you can also Create Daily System Restore Points using Group Policy Editor. Note: It is recommended that you make a backup of Registry Files before making changes to registry files.
- Right-Click on the Start button and click on Run. In Run Command window, type regedit and click on OK.
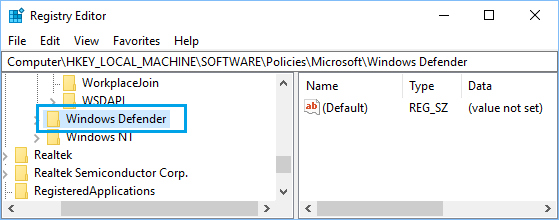
Note: You can also open the Run Command window by pressing Win + R keys. 2. On the Registry Editor Screen, navigate to HKEY_LOCAL_MACHINE\SOFTWARE\Policies\Microsoft\Windows Defender.
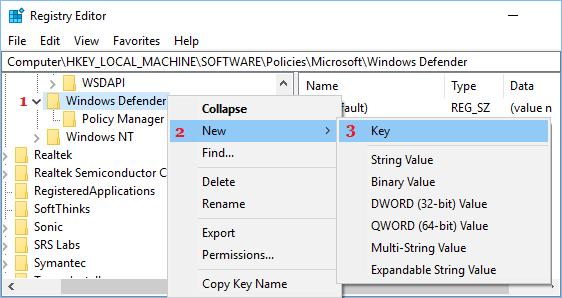
Right-click on Windows Defender, select New > Key option in the contextual menu.
Name the newly created Key as ‘Scan‘.
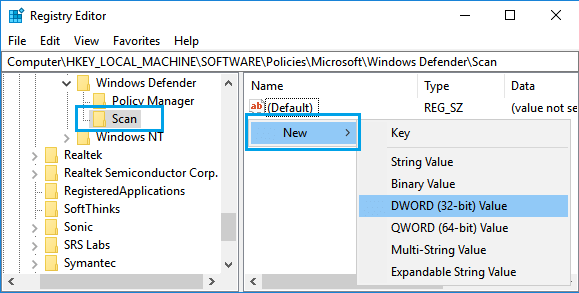
Open the Scan Folder > right-click anywhere in the right panel and select New > DWORD (32-bit) Value in the contextual menu.
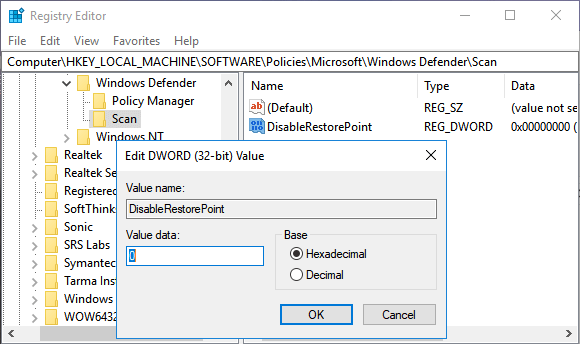
Name the newly created DWORD as DisableRestorePoint and double click on it.
In Edit DWORD pop-up, enter “0” as value data and click on OK to close the DWORD.
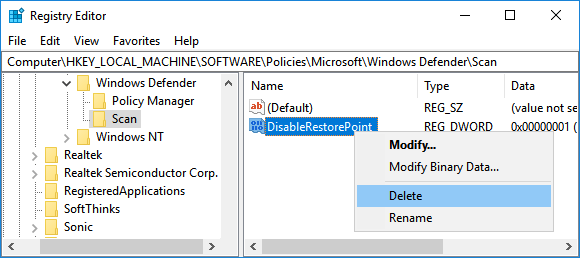
Restart your computer to enable this change. From now on, Windows Security will start creating daily restore points on your computer. At any time, you can prevent Windows Security from creating daily System restore points by changing the Value data for DisableRestorePoint DWORD to “1” or by deleting the DisableRestorePoint value.
Create Daily System Restore Points Using Group Policy
If you are using Windows Pro, you can enable Daily System Restore Points by using Group Policy Editor.
Right-click on the Start button and click on Run. In Run Command window, type gpedit.msc and click on OK to open Local Group Policy Editor.
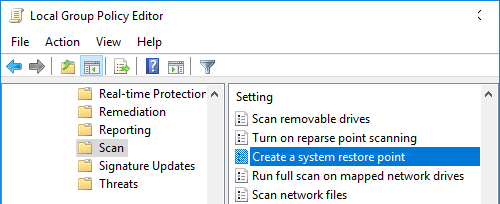
On Local Group Policy Editor screen, navigate to Computer Configuration > Administrative Templates > Windows Components > Windows Defender Antivirus > Scan.
Open the Scan folder and double-click on Create a system restore point in the right pane.
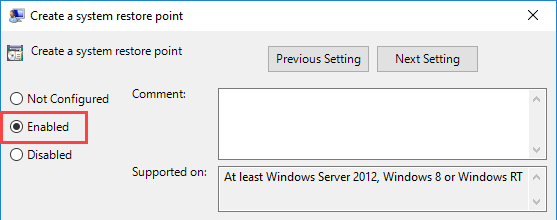
On the next screen, select the Enabled option and click on the OK button to save the changes.
Restart your computer to enable this Local Group policy on your system. From now on, Windows Security will automatically create a System Restore Point, whenever it scans your computer for viruses on a daily basis. At any time, you can disable Daily Restore Points by going back to Group Policy Editor and selecting Disabled or Not configured option on “Create a system restore point” screen.
How to Backup Files in Windows 10 Using Backup and Restore How to Backup Files Using File History In Windows 10