Authorize And Deauthorize MacBook on Apple Music
The way Apple’s licensing system works, it prevents users from accessing even purchased content in Music App, until your device is formally authorized to use Apple Music. Currently, you can authorize up to 5 computers on Apple Music, which points to the importance of deauthorizing old and unused computers, in order to create room for new computers in the Music App.
Steps to Authorize MacBook on Apple Music
The Music App is installed by default on MacBooks, if you have an older Mac, you may have iTunes installed on your device. Open the Music App on your MacBook > select the Account tab in top-menu bar > hoover mouse over Authorizations and select Authorize This Computer option in the side-menu.
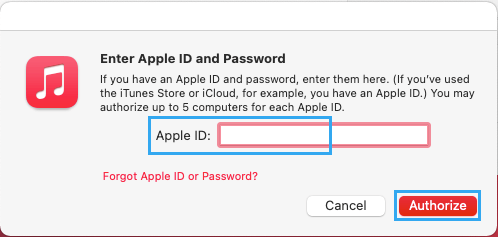
On the pop-up, enter your Apple ID, Password and click on the Authorize button.
This will authorized your computer on Apple Music, which allows you to View, Access and Play any digital content that is available in your Apple Music Account on this MacBook.
Deauthorize MacBook on Apple Music
If required, you can Deauthorize your MacBook in Apple Music and prevent it from accessing paid Music in Apple Music App. Open Music App > select the Account tab in top-menu bar > hoover mouse over Authorizations and select Deuthorize This Computer option in the side-menu.
On the pop-up, enter your Apple ID, Password and click on the Deauthorize button. This will deauthorize and remove the computer from Apple Music, which basically creates an empty spot for another computer in Apple Music.
How to Set Sleep Timer In Apple Music on iPhone How to Add Music to iPhone Without iTunes