There is no bit of doubt that Windows 10 helps its users by offering extraordinary useful facilities. But, sometimes, Windows 10 hassle its users with quite common issues such as Sleep Mode Not Working. However, it is rare to undergo this issue, but nowadays, many users encountered this issue and complained that Windows 10 Sleep Mode not working. But no worries, through this write-up, we’ve brought up the solutions that help you to fix the Sleep Mode not working issue. but before you switch to the solutions, we want to explain to you why this issue occurs, just for future prevention.
Why is Sleep Mode Not Working on Windows 10?
Sleep Mode is the power mode in computers that saves an excessive amount of electrical power. However, sometimes your computer isn’t going to sleep. This issue is quite common and there are numerous reasons that cause so. But, inapplicable settings, interruption of the third-party software, and outdated device drivers are the most general causes because of which Windows 10 Sleep Mode issue occurs.
Quick Solutions to Fix Sleep Mode Not Working on Windows 10
If you are bothered because of the Sleep Mode Not Working issue, then go through the below shared solutions to fix this issue instantly. You don’t need to try all the solutions, choose whichever you find suitable.
Solution 1: Check For Power Settings
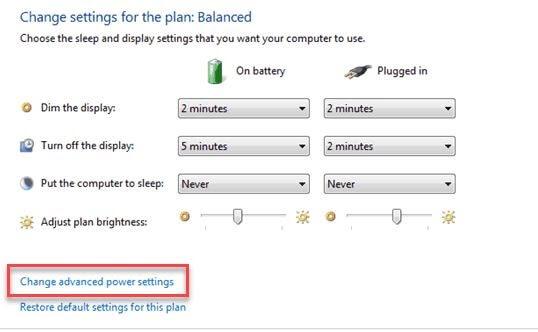
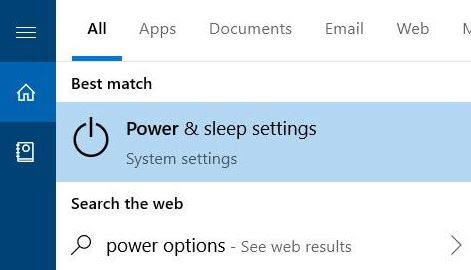
At a very initial point, in order to fix Sleep Mode not working issue, you can check for Power Settings. If your usual Power Settings don’t let your PC sleep, then set it to the default settings that allow your PC to go to sleep. Here are the steps to set the Power Settings to default. Step 1:- Hit the Win key from your Keyboard and then, type Power Options in the search box. Thereafter choose the best match for it. Step 2:- Now, this will trigger the Power Options window, here you’ll notice that Balanced Mode is selected by default, then to re-set click on the Change Plan Settings. Note: Just in case, if you are utilizing the other Power Mode options then click on it accordingly. Step 3:- After this, the other window will open, herein you have to click on the Change Advanced Power Settings tab.
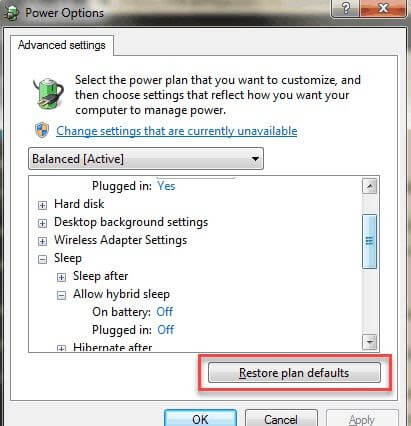
Step 4:- Then, to restore the default settings, from the new Power Options window, click on the Restore Plan Defaults.
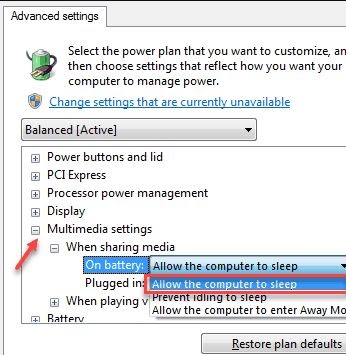
Step 5:- Plus, in the advanced settings window, you can also extend the Multi-media Setting option, and after that locate the When Sharing Media option and expand it.
Step 6:- Herein, you find two options i.e., On battery and Plugged-in, set both options Allow the Computer to Sleep and select it from the drop-down menu. Keep in mind, that you will not find the two options under the When Sharing Media option if you’re accessing a desktop PC. Once you’ll be done with all this, then click on the OK option and try to make your PC sleep just to ensure whether your PC’s Sleep Mode Not Working issue fixed or not. If it still remains the same as earlier then jump on the other solutions. Read Also: Fix Red Screen Issue on Windows 10
Solution 2: Turn Off Fast Startup
If the above solution isn’t working for you, then try to turn off the Fast Startup feature. But for obvious, that Fast Startup is the utmost crucial features that directly resume files from the hiberfil.sys. But, in many cases, it is not compatible with the older version of PCs and laptops. And, results in Windows 10 Sleep Mode issue. So, here are steps to turn off the Fast Startup! Step 1:- Type Power Options in the search box of your Windows. Step 2:- Then, choose the Best Match.
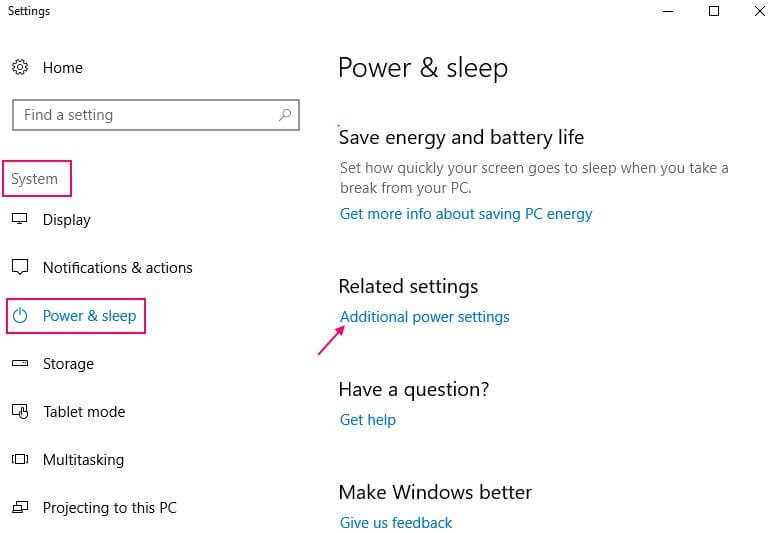
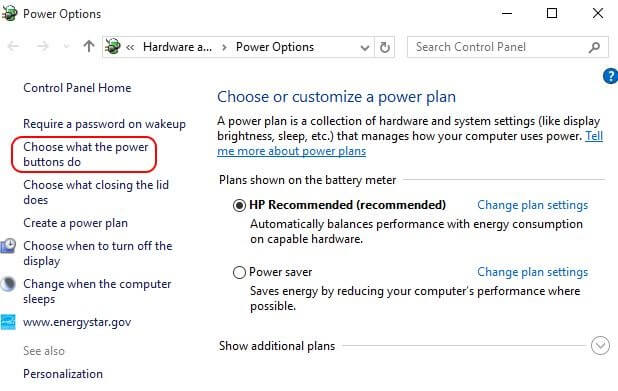
Step 3:- After this, click on the Advanced Power Settings from the left-pane side.
Step 4:- Click on the Choose What Power Button Do.
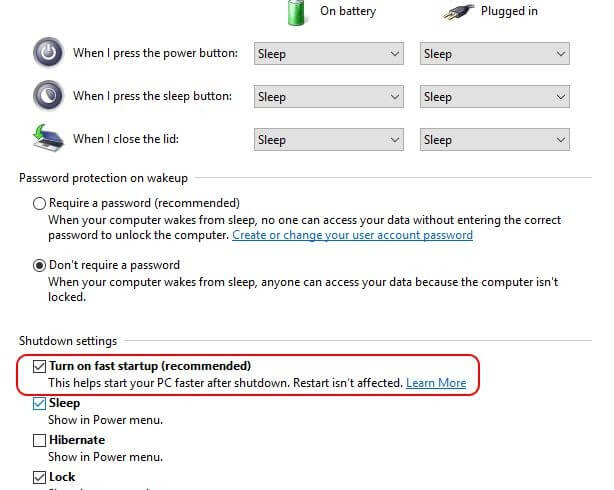
Step 5:- Now, from another window click on the Change Settings that are Currently Unavailable option. Step 6:- Thereafter, unmark the Check box that cites Turn on Fast Startup.
Just within the 6 steps you can easily turn off the Fast Startup and fix Windows 10 Sleep Mode Not Waking Up. Read More: Fix Function (Fn) Keys Not Working On Windows 10
Solution 3: Run Power Troubleshooter
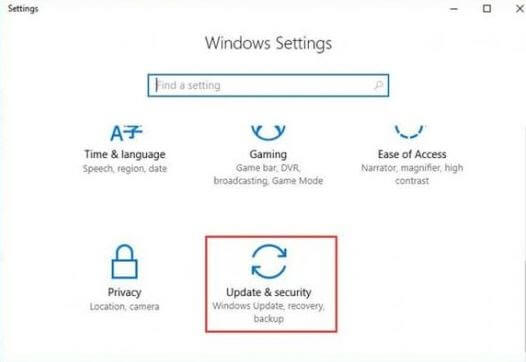
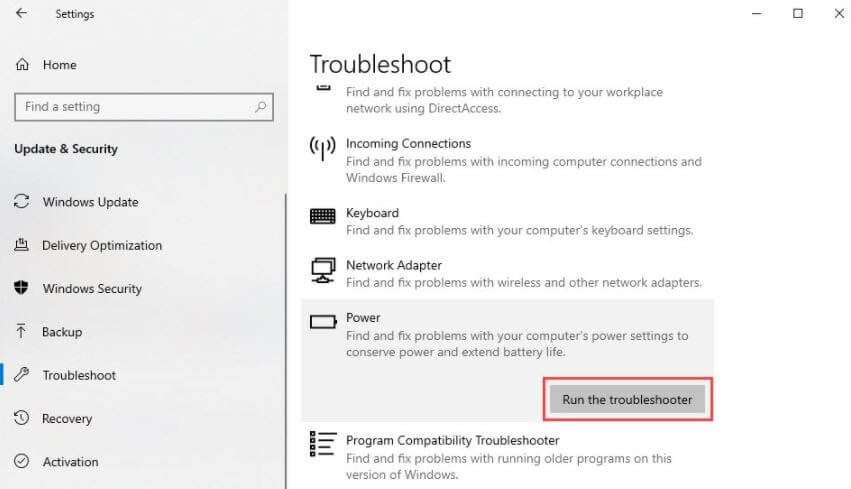
In order to fix the Sleep Mode not working issue, you can also run the Power Troubleshooter. Here is how to do it! Step 1:- Hit the I and Window key from your Keyboard. Step 2:- Then, locate the Update & Security option and click on it.
Step 3:- Now, click on the troubleshooter option and then click on power and then click on Run the troubleshooter.
After doing all this, go with the on-screen instructions to complete the process. And, examine whether the issue solved or not. Read More: Fix Flickering Screen Issues on Windows 10
Solution 4: Upgrade Your Device Driver
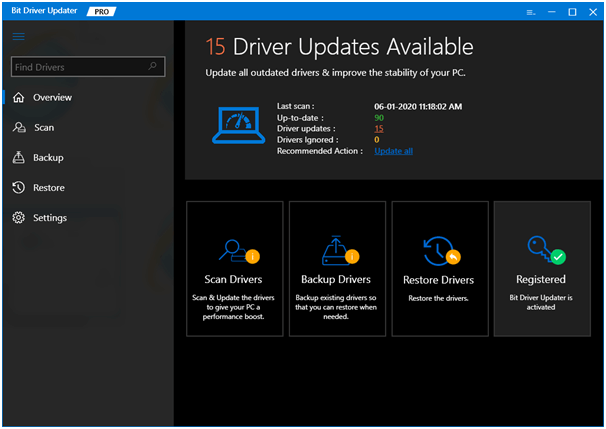
If the above solutions aren’t able to solve the Sleep Mode Not working issue. Then, try to update your device drivers, this will surely heal the problem. To do this task much easier and quicker, use Bit Driver Updater, a fabulous automatic tool. Here is how to do it using Bit Driver Updater! Step 1:- Download and introduce the Bit Driver Updater. Step 2:- Then, wait until the automatic scanning procedure gets completed.
Read More: Best Driver Updater Software for Windows PC Step 3:- Now, carefully go through the list of outdated drivers. Step 4:- Lastly, click on the Update Now option to get new installs. If you want to update all the drivers simultaneously, then click on the Update All instead. Sounds so amazing! So, what are you waiting for, hit the below download tab to launch the Bit Driver Updater on your system.
Sleep Mode Not Working on Windows 10 [Fixed]
Windows 10 Sleep Mode not working issue is quite usual and easy to fix as well. So, if you are also encountering the same issue then no need to panic, as by choosing the accurate solution from the above you can fix this hassle issue. Hopefully, now you can easily fix the Sleep Mode not working issue. But, still, if you face any difficulty while act so, then do share it with us through a comment box below. We’ll make all possible efforts to help you out. So, that’s are our closing words on this, we’ll back again shortly with yet another informative article to help you out. Till then, do not forget to subscribe to our Newsletter for getting the latest tech updates directly!
