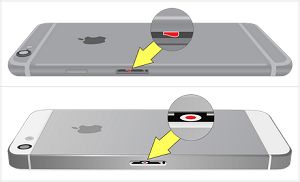
Why Does iPhone Gets Stuck in Headphone Mode?
The problem of iPhone being stuck in Headphone mode is usually caused due to presence of lint, grime or dust in the headphone jack, which tricks iPhone into believing that it is attached to Headphones. Although, newer iPhones (iPhone 7 and later) do not have a traditional headphone jack, they can still be plugged to Wired Headphones via the charging port and suffer from the same problem.
1. Restart iPhone
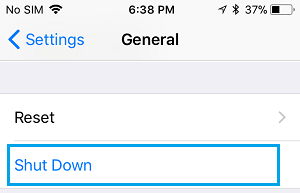
Start by restarting your iPhone to rule out the possibility of iPhone going into Headphone mode due to a software glitch. Go to Settings > General > Shut Down.
After iPhone shuts down completely, wait for 60 seconds and press the Power button to restart your iPhone.
2. Turn OFF Bluetooth
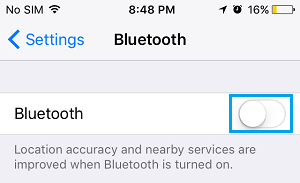
Another software related reason for this problem is due to iPhone being connected to AirPods, Bluetooth Headphones or External speakers. Go to Settings > Bluetooth > and turn OFF Bluetooth by moving the toggle to OFF position.
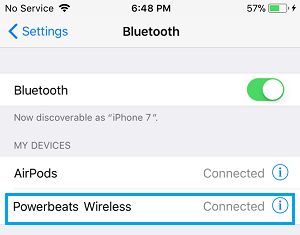
If you do not want to Turn OFF Bluetooth, you can disconnect Bluetooth Devices by tapping on the i Icon located next to the Bluetooth Devices under “My Devices” section.
3. Plug Wired Headphones into iPhone
If your iPhone has a Headphone Jack, you should be able to bring your device out of Headphone mode by plugging wired Headphones into the Headphone jack and pulling them out. Repeat the above steps 4 to 5 times and check if you can hear any sound, when you play music or video on your iPhone. If you have a newer iPhone (iPhone 7 and later), wired Headphones can be plugged into the Charging Port by using an Adapter.
4. Clean Headphone Jack
Use a Flashlight to check for the presence of Lint/Debris in the Headphone Jack of your iPhone. If stuck particles are small, you should be able to remove them by blowing air through your mouth. If you see lint or grime, you can use a Earbud or Plastic Straw to clean the Headphone Jack. While cleaning, make sure that you are not using excessive force or causing damage to the Headphone Jack.
5. Clean the Charging Port
In case of newer iPhone (iPhone 7 and later), the problem is caused due to dirt or grime getting into the Charging Port. The safest way to clean the Charging port is to use an Anti-static brush (if available). If not, you can use a New or Unused Toothbrush. If there is something stuck inside the charging port, you can use anything made out of plastic (Straw or Coffee Stirrer) to dislodge the stuff and remove it from the Charging port. Warning: Do not use a Paperclip, Needle or anything made out of metal to clean the charging port. Metal items can damage the charging port by causing an electrical charge.
6. Inspect iPhone for Water Damage
Sometimes, the problem is caused due to water or liquid getting into iPhone and causing Water Damage to iPhone. You can inspect your iPhone for water damage by removing the SIM Card and peeking into the SIM Tray Slot. Your iPhone is free from Water Damage, if you can see white or silver colored circular sticker through the SIM Card Slot.
If you see a Red Dot in the middle of the white/silver sticker, it is bad news as it confirms Water Damage. The safest option in such a case is to Shut Down iPhone > Remove iPhone Cover > Remove SIM Card and allow iPhone to dry out for at least 48 hours. Note: Do not try to start or charge your iPhone, as it can cause damage to electrical components of iPhone.
How to Stop iPhone From Auto-Playing Music In Car How to Reverse Image Search on Google
