In the realm of computer peripherals, Razer is the leading label. Most of the individuals prefer to use Razer’s keyboard, mouse, headsets, and other peripherals. And, how we can even forget to mention that Razer also produces high-end gaming laptops for their fans. But, do you know that in order to maintain the Razer devices’ efficiency for long periods you need to keep its drivers updated always. Download Razer drivers frequently to ensure the effective working of the device. Yeah! Drivers are the core that ensures the effectiveness of an entire device. Let’s jump onto the next section to know how to do so!
How To Download and Update Razer Drivers For Windows 10/8/7
Though there are several ways to perform driver updates for Razer devices maybe they are a bit cumbersome. So, just have a look at the below-mentioned most effortless yet convenient ways to install Razer drivers for Windows 10/8/7.
Way 1: Download and Install Razer Drivers from Official Razer Support
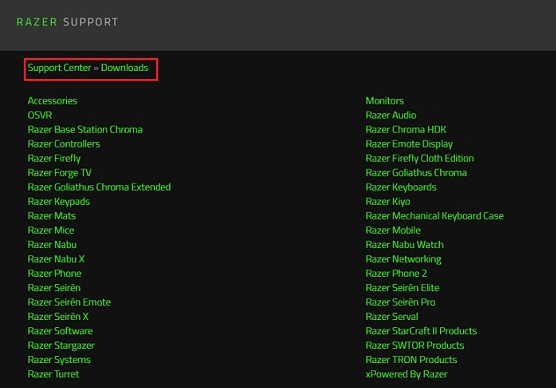
If you have quite a distinct technical knowledge then you can opt for this method. There is no doubt in admitting that nothing is better than a reliable or official source. Isn’t it? Similarly, you can also download Razer drivers from its official website of Razer. Follow the below-listed steps! Step 1:- Go to the official Support Page of Razer.
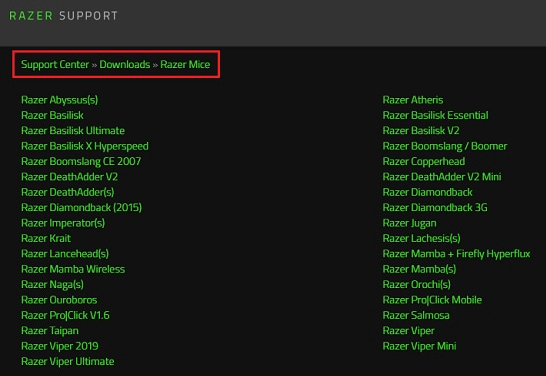
Step 2:- Then, choose the product category of the Razer device and then click on the specific Razer device for which you want to download or update the driver.
Step 3:- After this, choose the Drivers option.
Step 4:- Lastly, click on the Download option to install the latest version of drivers.
That is how you can download Razer drivers for Windows 10 from the official support page. But it is a quite time-consuming and tiresome task to update drivers manually, especially when you are not familiar with the technical skills. Therefore, read along to know the most convenient way to perform the same task. Read Also: HyperX Cloud 2 Mic Not Working On Windows 10
Way 2: Update & Install Razer Drivers Using Device Manager
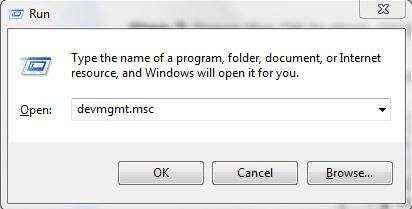
Windows OS has an in-built utility tool that lets you perform driver download and update for any device and that is Device Manager. Here is how to update Razer drivers from Device Manager! Step 1:- Open the Run dialog box quickly by pressing Win and R keys simultaneously from your Keyboard. Step2:- Then, write devmgmt.msc in the empty box and hit the enter key from the keyboard or click on the ok option.
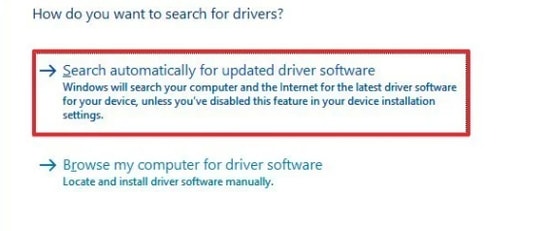
Step 3:- This will open the Device Manager window. Then, locate the category of Razer device and expand it. Step 4:- After this, choose the Razer device and click right on it. Then, select the Update driver option from the list. Step 5:- Now, click on the search automatically for updated driver software.
Now, windows will start searching for the Razer devices and will automatically install the new updates too. To update Razer drivers instantly switch to our next method. Read More: Best Ways to Update Outdated Drivers in Windows 10
Way 3: Automatically Update Razer Drivers via Bit Driver Updater (Experts-Recommended)
The above two ways are very time-consuming processes and need quite distinct technical knowledge. But, if you are a newbie or a busy one who doesn’t have time for manual processing then here is one way to update Razer drivers and i.e., using Bit Driver Updater. Bit Driver Updater is a fully automatic driver updater tool that updates & installs all the drivers in one click. And, you do not need to have proper technical knowledge with Bit Driver Updater. One-click update, time saver, supercharge performance, 24/7 technical support, budget-friendly, are some of the core features of Bit Driver Updater. Along with this, you will be amazed by knowing the super-fast and easy working of Bit Driver Updater. How Does It Work? Just follow four steps and you will arrive at your destination. Let’s read how Bit Driver Updater works! Step 1:- Download Bit Driver Updater from the below-given link. And, launch it by running the setup file.
Step 2:- After this, it will start scanning for the outdated drivers. You have to wait until it gets over. Step 3:- Next, review the list of outdated or corrupt drivers. Step 4:- Lastly, click on the Update Now tab that appeared next to the outdated driver. And, if you think to update all the drivers at one time. Then, click on Update All instead of Update Now.
Download Windows 10 Razer drivers with Bit Driver Updater is the most effortless way to perform driver download. Isn’t it? Then, download it now! Plus, purchase its premium version to get unlimited access to its advanced features. Read More: Download Realtek High Definition Audio Drivers for Windows 10, 8, 7
Download & Update Razer Drivers on Windows 10/8/7 – [Done]
Thus, how you can download and update Razer drivers for windows 10/8/7. Through this write-up, we have tried to help you by providing the list of best approaches to perform the same task. We hope, that all of you have found this complete installation guide very helpful. Plus, if you have any suggestions regarding this then do tell us in the comments box below. And, to enhance your know-how about technical skills do subscribe to our Newsletter as we provide such kind of helpful guides regularly. And, you can also follow us on Twitter, and Facebook. That’s all for now, we’ll come sooner, till then, connect with us!


