AirDrop Not Working on iPhone
The AirDrop feature on iPhone allows you to wirelessly transfer Files, Photos and Videos from iPhone to any other Apple Device, located near the sending device. While, AirDrop works flawlessly most of the times, it also known to run into problems due to incorrect AirDrop settings, network related problems and other reasons. In certain cases, the AirDrop Icon appears greyed Out and becomes unresponsive. If this is the case, you need to refer to this guide: How to Fix AirDrop Greyed Out on iPhone and Missing on Mac. If AirDrop icon is not greyed out and yet AirDrop is not working, you should be able to fix the problem using troubleshooting methods as provided below.
1. Check Device Compatibility
In order to use AirDrop, the sending device needs to be an iPhone 5 or later and the receiving device needs to be an AirDrop compatible device (iPhone 5 or later, iPod 5th Generation). If you are transferring files from iPhone to Mac using AirDrop, the MacBook needs to be 2012 or later device, running OS X Yosemite or later version of macOS.
2. Enable Bluetooth
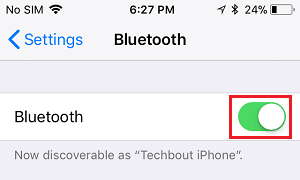
In addition to WiFi or Cellular Network, AirDrop makes use of Bluetooth to locate nearby devices. Hence, make sure that Bluetooth is enabled on both sending and recieving devices. Go to Settings > Bluetooth > Make sure Bluetooth is toggled ON.
After Enabling Bluetooth, you should be able to transfer files using AirDrop.
3. Enable/Disable AirPlane Mode
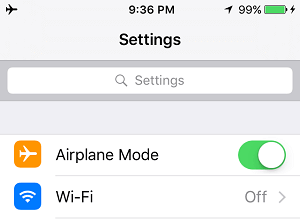
Open Settings and move the toggle next to Airplane Mode to ON position.
Wait for 30 seconds and disable Airplane Mode by moving the toggle to OFF position.
4. Make Both Devices Discoverable
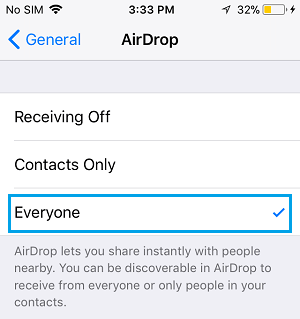
Both sending and receiving devices need to be discoverable in order transfer files using AirDrop. On iPhone, go to Settings > General > AirDrop > make sure either Everyone or Contacts Only is selected.
Similarly, the receiving device needs to be discoverable.
5. Turn OFF Do Not Disturb Mode
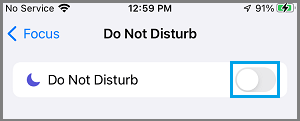
You won’t be able to transfer files using AirDrop, if the receiving device is placed in Do Not Disturb Mode or Driving Mode. Go to Settings > Focus > Do Not Disturb > move the toggle next to Do Not Disturb to OFF Position.
After disabling DND Mode, you should be able to transfer files using AirDrop.
6. Disable Personal Hotspot
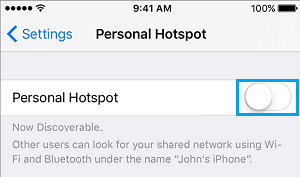
AirDrop does not work if personal Hotspot is enabled on your device. Go to Settings > Cellular > Personal Hotspot > disable Personal Hotspot by moving the toggle to OFF position.
7. Allow AirDrop from Everyone
AirDrop provides the option to Share Data with “Contacts Only” and also with “Everyone”. Since, you are experiencing problems, select the Everyone option and see if this helps. Go to Settings > General > AirDrop > On the next screen, tap on Everyone.
Note: If you want to use AirDrop in “Contacts Only” mode, you need to make sure that both sending and receiving devices are signed into iCloud.
8. Reset Network Settings
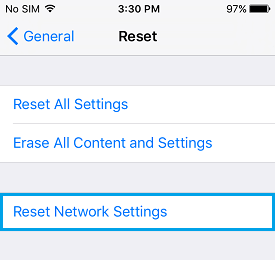
Make sure that you note down the Password for your WiFi Network, before going ahead with the steps to Reset Network Settings on your device. Go to Settings > General > Transfer or Reset iPhone > Reset > On the pop-up, select Reset Network Settings option.
If prompted, enter your Lock Screen Password > On the confirmation pop-up, tap on Reset Network Settings to confirm. After iPhone restarts, go to Settings > WiFi > select your WiFi Network > enter the Password to join your WiFi Network.
Check the Receiving Device
If you are still unable to get AirDrop working, make sure that the other device that you are transferring or receiving AirDrop data from is properly setup to use AirDrop. If you are trying to AirDrop from iPhone to Mac, refer to this guide: How to Fix AirDrop Not Working on Mac.
How to AirDrop From Mac to iPhone How to AirDrop Files and Photos From Mac to Mac
